Cupcake Nail Art Tutorial

I have an obsession with small, cute things. I especially love cupcakes. They’re perfect for one person, with just the right amount of frosting & there’s just enough room to put some finishing touches, such as sprinkles & a cherry on top.

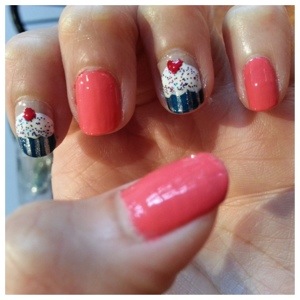
What’s cuter than a cupcake? Cupcakes on your nails! The process was fairly easy, but it’ll take some time for each layer to dry before moving on. I did put too much “frosting” on 2 of my nails, so it got mushed up when I went out. I’ll have to remember not to do anything until it’s completely dried.

20130715-151331.jpg
1) I always take paper from the recycling bin (this was an Rite-Aid ad) to test out color combinations first. This makes it easier when it’s time to actually paint my nails because I already have an idea how it will come out. Plus, some colors just do not go well together.

2) Put on a clear base coat. Put on a bright coordinating color on your thumb, middle & pinky finger. (Revlon – Strength of Pink) Put on a neutral color on your index & ring finger to be used for the cupcake design. (Revlon – Sheer Nude)

3) Paint the cupcake liner across half of your nails. (O.P.I. – Yodel Me On My Cell)

4) Using a thin brush, create the vertical creases of the cupcake liner. (LA Colors Art Deco – Silver)

5) Paint a fluffy white dome on top of the cupcake liner. Try to not make this layer too thick. Unfortunately, mine was & it got mushed when I picked up my purse. (Wet n Wild Wild – French White Creme

6) Use a clear glitter nail polish to add the “sprinkles” on the “frosting.” (E.l.f. – Sparkles)
20130715-151338.jpg
7) Use a Dotting Toolor a toothpick to create the “cherry” on top. Dip your tool into the polish color to create a circle. I used a toothpick to create the heart. Practice on paper first so you can get it perfect on your nails on the first try. (Nailtini – Mango Rita) When everything is completely dry, add a clear top coat.
20130715-151343.jpg
This is possibly the cutest nail design I’ve done so far. I’m so happy with the way it came out. I’m sure I’ll go through all the colors of the rainbow to create more cupcakes in the future.

Hope you like this tutorial! ENJOY!

Where to purchase products:
Nailtiques 1 – used as my base coat to help my nails get stronger. Here’s the larger bottle.
Nailtiques 2 – you’ll use this every day for a few weeks for brittle nails to get stronger.
Revlon – Strength of Pink
Wet n Wild – White
Revlon – Sheer Nude
O.P.I. – Yodel Me On My Cell
LA Colors Art Deco – Silver
E.l.f. – Sparkles
Nailtini – Mango Rita

Nail Stamping Tutorial

Nail Stamping Tutorial

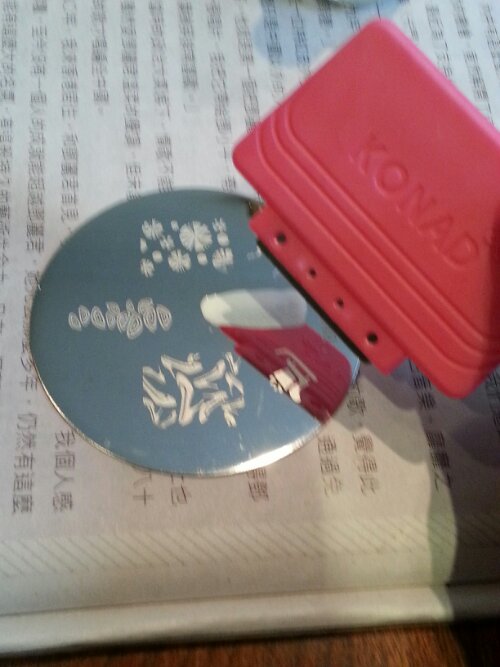
Nail stamping has been gaining popularity in the past year or so. Nail art has become all the rage. I surfed many nail blogs & YouTube videos to learn more about nail stamping. Then, I took the plunge. I bought myself the Konad Stamper & some plates from Konad & Bundle Monster.
image
Overall, the Konad plates cost more, but they work 100% of the time. Bundle Monster has a wider variety of plates, but I’ve had some read duds. Either the etched design is too shallow or there was just too much space in the design, so the color never gets picked up. I think I’ll stick with Konad from now on. The price is worth the product working 100% of the time. Less frustrations & headaches from having to re-do your nails because the design didn’t get picked up properly.
image
Your fingers should already have the base coat & color on it before you start. Make sure the color is completely dry before attempting to stamp, otherwise your color will get mushed up.
image
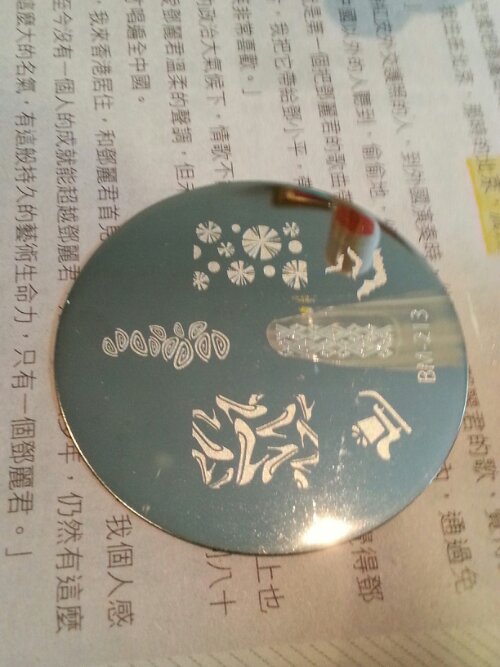
The idea behind nail stamping is to use your nail polish to fill the design etched into the plates (that’s a Bundle Monster BM-213 plate I’m using).
image
Using either the squeegee supplied or an old plastic credit card, you swipe off the excess nail polish from the template. Make sure to use newpaper to protect your table. No one likes nail polish all over their wood/glass table.
image
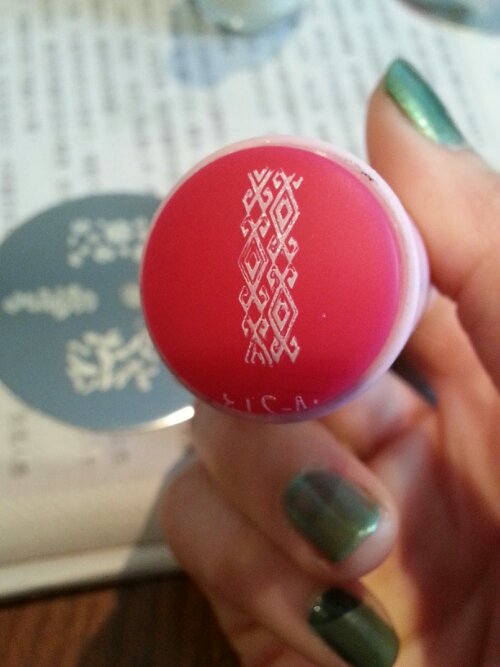
Then you take your Konad stamping tool with the rubbery end & roll it on top of the template to pull the design off. Now the design is attached to your tool. It looks pretty cool at this point.
image
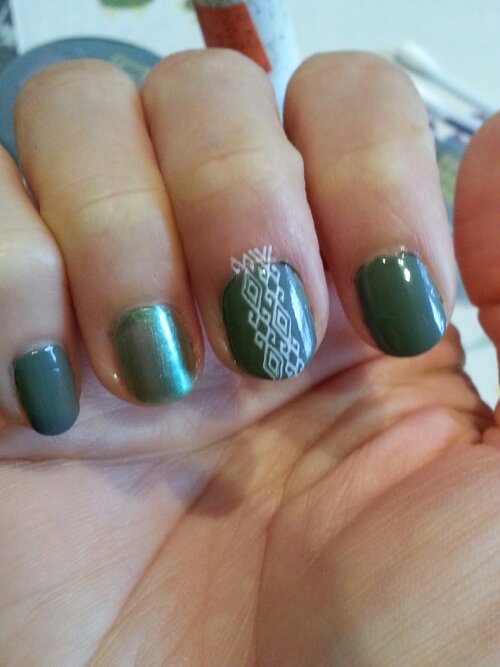
Quickly, but carefully, place the design on your nail & roll it from one end to the other & pull off. Magically, the design transfers onto your nail.
image
Clean the stamping tool with nail polish remover. And repeat the steps for your other nails.
image
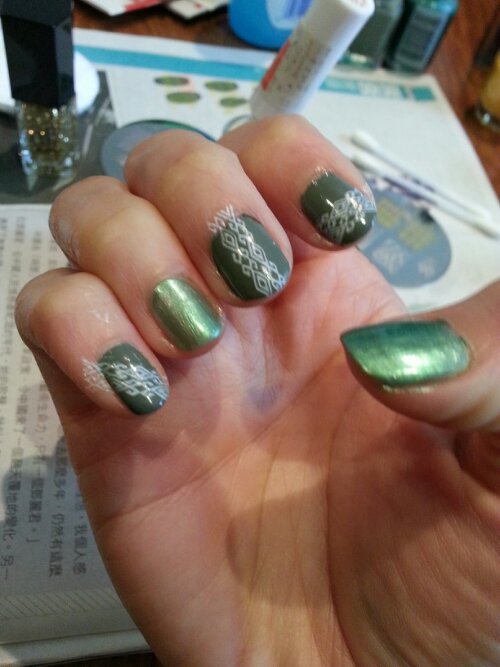
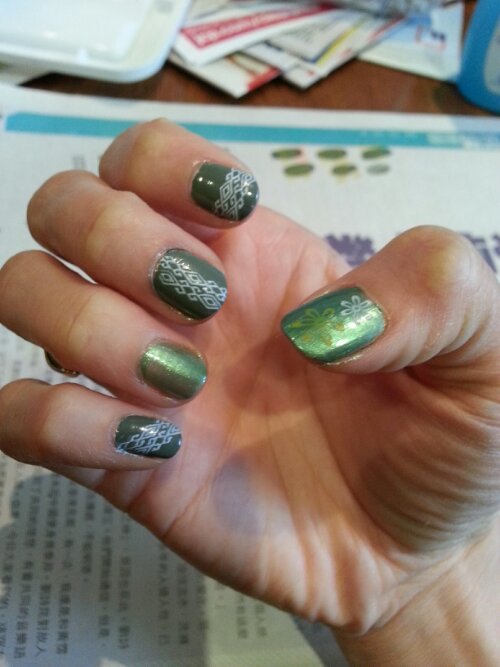
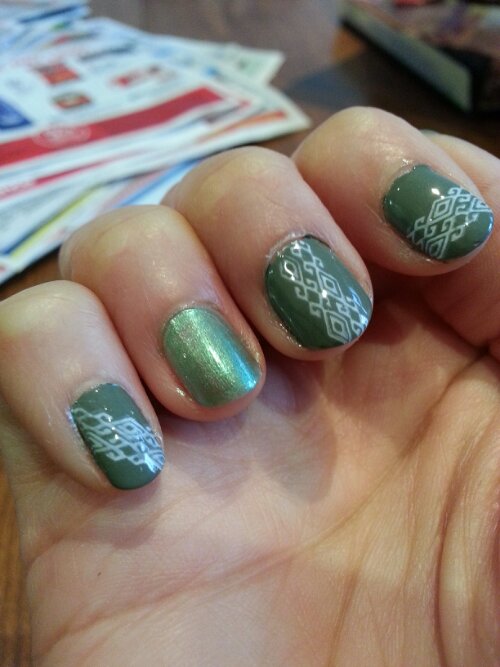
Using a cotton swab, clean off the edges. It comes off pretty easily. I put some flowers using the smaller end of the stamping tool onto my thumb. The flowers are from a Konad plate.

This is such a fun & easy thing to do to liven up your nails. If you have old chipping nail polish, it’s the best time to experiment with stamping before you remove your polish.
image
I’ve found old, thick, opaque nail polishes work best for stamping. Putting a light base color with a darker stamping color makes the best contrast. The websites all tell you to buy their special stamping nail polishes, but I’ve read elsewhere many of the ones you already own work just as well. My Wet ‘n Wild White nail polish from over 15 years ago (bought at Caldors which closed down eons ago) works really well. This is a great way to use up all those old nail polishes that’s been sitting around.

Have you tried nail stamping? What’s your favorite design? Happy stamping!

Where to purchase products:
Essie – Sew Psyched
New York Color – Precious Peacock
Wet n Wild Wild – French White Creme
The plate I used above (BM-213) came from this Bundle Monster Set
Konad Plates
Nailtiques 1 – used as my base coat to help my nails get stronger. Here’s the larger bottle.
Nailtiques 2 – you’ll use this every day for a few weeks for brittle nails to get stronger.

DIY Matte Nail Polish Tutorial

Did you know you can get the Matte Nail Polish look without having to buy anything extra? There are tons of Matte Nail Polishes out there now since it’s the new trend. They’ve even created a Matte Top Coat so that you can mattify any of your current nail polishes.

If I can find a way to DIY, I will. Here’s a free DIY Matte Nail Polish you can do at home. FREE is always better. ;-D

DIY Matte Nail Polish Tutorial

All you need are:

Clear Base Coat
Nail Polish Color
Pot of boiling water
Top Coat (optional)

matte nails 1
Heat up water over your stovetop. While that is heating up, you can put your clear base coat. And your nail polish color. Let that dry, then apply a second coat of your color. By this time, your water should be boiling. Carefully hover you fingers over the water. Be very careful, because the steam is strong & can burn. You can also just turn off the stove top at this point & hover your nails over. You’ll immediately notice a matte hue to the color. You’re basically done! Make sure you let the color air dry.

matte nails2
You can see Matte & Shiny finger in the above picture. You can use a top coat to change your matte nail back to shiny. I used it to create a French manicure look with the matte & shiny.

matte nails3
This is so simple & can be done with any of your current nail polishes. I love saving money & I hope you do, too!

ENJOY!

Where to purchase products:
Nailtiques 1 – used as my base coat to help my nails get stronger. Here’s the larger bottle.
Nailtiques 2 – you’ll use this every day for a few weeks for brittle nails to get stronger.

Obsessive Compulsive Cosmetics Nail Polish Review

Obsessive Compulsive Cosmetics

174 Ludlow Street
New York, NY 10002
PH: 212-675-2404 | FX: 212-214-0636
Mon – Sat: 11:00AM – 7:00PM
SUN: 12:00PM – 6:00PM

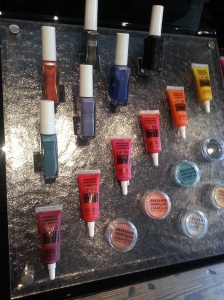
I decided to walk into this store since I love looking at new cosmetics, even if I don’t buy anything. The store didn’t look like much. There were a few tables on both sides & the cashier in the far back. There were 2 associates who greeted us. One came by to talk to us about the products. They are 100% Vegan & Cruelty Free, which are 2 pluses.

OCC Lip Tars

The star of their line are the popular Lip Tars. They come in a range of colors. Interestingly enough, they even come in blue, green, yellow & black! I am so not daring enough to rock those colors on my lips, but more power to the people who can. They come in a tube like a lip gloss would & you would squeeze a little out to get a bright lipstick-like color, or use even less as a lip stain. You can also use it as a blush as well. The reds are really nice. They retail for $18-$25.

OCC Lip Tars Nail Polish

I browsed the selection of nail polishes which does not contain formaldehyde, thank goodness. They retail for $10. I’m very much into nail art & design, but honestly didn’t want to pay $10 for a bottle of nail polish. I so happened to be by the cashier & they had a few colors that are being discontinued for $5, so I ended up picking up 3 shades (Fondue, Chimera
& Cruising).

FondueChimeraCruising

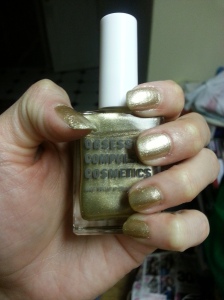
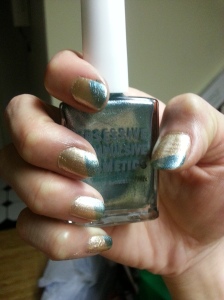
I couldn’t wait to use the colors so I ended up using Cruising as the base, which is a nice gold metallic color. Then, I simply swiped Chimera, a nice metallic blue/green at an angle at the edge of my nail for a simple design. The polishes are highly pigmented which meant I didn’t need multiple coats for nail coverage. I love the way they shimmer in the light. They went on smooth, without any clumps & they dried quickly. My nails were done in less than 15 minutes.

Cruising

If you are in the neighborhood, stopping into the store could be beneficial for you. After getting home, I looked up reviews on the product. I looked on Yelp & saw many people saying if you check-in on Yelp, you’ll get a FREE nail polish. I was kicking myself for not checking in. *sigh* Plus, I have a love/hate relationship with Yelp as well. That’s another story to be told at another time.

Chimera

I think I really love them. I can’t wait to do other nail art with them. What do you think of the colors?

Where to purchase products:
Lip Tar
OCC Nail Lacquer, Fondue
OCC Nail Lacquer, Chimera
Nailtiques 1 – used as my base coat to help my nails get stronger. Here’s the larger bottle.
Nailtiques 2 – you’ll use this every day for a few weeks for brittle nails to get stronger.

Blue Ombre Nails Tutorial

OmbreBlue4
Ombre Nails are really fashionable at the moment. From ombre hair to ombre clothes, this is a great way to do ombre without being too obvious. This is also a great way to use a bunch of colors in your stash at one time. This tutorial may look easy, but it took me quite some time to get this right since it was my first time using nail tape. I cannot reiterate how important it is for you to have the base color completely dry before attempting to put the nail tape on.

First, cut 40 pieces of Nail Tape. You will use 4 on each nail. I stick all of them on a plastic shoe box so that they are easily accessible. Pick out the 5 coordinating colors you want to use. Pick shades that go from light to dark & arrange them in that order on your table so you don’t forget later on.

Apply your base coat. Then, apply a layer of white nail polish. The white doesn’t have to be perfect since only parts of the white will show up later on.

When the white is completely dry, use 4 pieces of nail tape to divide your nail into 5 even sections. This will be the tricky & time-consuming part. I would suggest applying nail tape to all 10 fingers before beginning.
OmbreBlue1
I painted the darkest color first to all my nails on one hand, & then moved onto the next color. I finished one entire hand before moving on to the 2nd hand.OmbreBlue2
When the paint is dry, carefully pull off the nail tape. This might take some practice because there is a chance the tape will pull off your top color, so do this slowly & carefully.
OmbreBlue3
Finish your nails with a top coat & you are finished.

Where to purchase products:
L.A. Colors Nail Polish – Blue
OPI – Yodel Me on My Cell
NYC Color – Pier 17
New York Color – East Village
Sally Hansen – Blazing Blue
Wet n Wild Wild – French White Creme
Nail Tape
– 10 rolls last a long time.
Nail Tape – 30 piece so you’ll never have to worry about buying tape ever again!
Nailtiques 1 – used as my base coat to help my nails get stronger. Here’s the larger bottle.
Nailtiques 2 – you’ll use this every day for a few weeks for brittle nails to get stronger.

Geometric Grey/Pink Nails Tutorial

The Geometric look is actually quite simple to do, but you’ll need a little patience. I chose hues of pinks & greys for my nails because I had those shades on hand. You can do whatever color combo you want. It’s really up to you to decide.

Always use a base coat before applying any color on your nails. This will prevent yellowing of your nails. Dark reds, purples, blacks & blues can cause major discoloration. The stains are not pretty & you’ll definitely regret not using a base coat.

I applied a light grey color over all my nails. You must wait for this layer to dry completely. It should not feel tacky to the touch.  This is probably the most important step for this nail design.

Next, you will cut 28 strips of Nail Tape. You will use 3 on each nail (the pinky has 2 since it’s just a cross). I like to make all the boxes different sizes. For the ring finger, I did 3 stripes as my accent nail.

20121211_150752
Tape both hands. Once your tape is on, you will now carefully apply your 4 colors to each box. Instead of switching nail polish 4 times on each nail, I started with the darkest color & applied it to all the nails, then went to the 2nd color, etc. I used one color for the accent nail.

GreyPinkNail2
I am a secret perfectionist. Shhhh, don’t tell anyone. Anyway, I was being geeky & created this table for each nail if you really want a different color in the same section of each nail. Does that even make sense? Well, I hope you understand once you see the table. Even geekier, I had to google to get the code to create a table. I’ve totally forgotten how to create a table with HTML! *sigh*

Nail 1 Nail 2 Nail 3 Nail 4
A B C D D A B C
C D A B B C D A

A, B, C, D representing the 4 different shades you’ve picked out. I was in Chicago when I had to write down this color combo. Even on vacation, I think of my nails. Good grief.

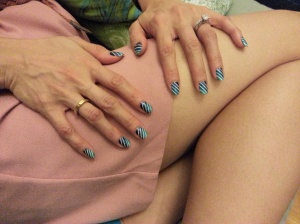
Let the polish dry & then carefully pull off all the tape. Apply a top coat to preserve your nail design. Look at how pretty this came out! I couldn’t stop looking at them once I was finished.

GreyPinkNail3
Who says you can’t be fashionable when you Crossfit?!? Always look your best even when you’re a sweaty mess. 🙂

GreyPinkNail4

Where to purchase products:
Nail Tape – 10 rolls last a long time.
Nail Tape – 30 piece so you’ll never have to worry about buying tape ever again!
Nailtiques 1 – used as my base coat to help my nails get stronger. Here’s the larger bottle.
Nailtiques 2 – you’ll use this every day for a few weeks for brittle nails to get stronger.
Harbinger Workout Glove – I love these gloves. They keep my hands callus free!

Simple Blue & Yellow Triangle Nail Art Tutorial

This design is very simple to do. It took less than 30 minutes from start to finish. I didn’t take pics when I did my hands, so I’ll show you with my toe. The yellow looked a bit bland, so I figured I’d do the big toe to dress it up a bit.

NailsBlueYellowTriangle
I bought Nail Tape on Amazon.com. It should cost you no more than $2 for 10 rolls. They are tiny rolls but they last a long time. Cut them into strips before you start on your nails. This will make everything easier for you later on. I like them slightly longer so it’s easier for me to peel them off when I’m done.
NailTape
You first put your base coat & let that dry. Then you put your first color (I did yellow). Let that dry completely otherwise the tape will pull off your color, which will cause a mess & you’ll get really frustrated. Been there, done that. Use the tape to create your triangle. If the point looks off, carefully peel the tape off & try again. Once you have the shape you want, apply the accent color (I used blue). Let that set for a minute, then carefully peel the tape off. Let that dry then finish everything off with a top coat. Simple & quick.

Note: I find that using a darker color for the accent works best. The yellow accent (on my index finger) started mixing w/ the blue & turned green, but I added more yellow to cover it up.
NailsBlueYellowTriangle2
Now rock your summer nails with a hot dress! ENJOY!

Where to purchase products:
Nail Tape – 10 rolls last a long time.
Nail Tape – 30 piece so you’ll never have to worry about buying tape ever again!
Nailtiques 1 – used as my base coat to help my nails get stronger. Here’s the larger bottle.
Nailtiques 2 – you’ll use this every day for a few weeks for brittle nails to get stronger.
L.A. Colors Nail Polish – I got the Blue & Yellow Nail Polish from this brand. They are thick so it provides great coverage with one coat.